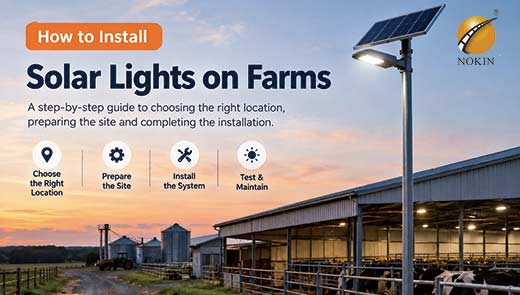
How to Install Solar Lights on Farms
Sep 21, 2026
Why Solar Light Installation on Farms Requires a Different Approach
Most farmers and installers follow the installation methods for solar street lights used in urban roads and ordinary courtyards. However, farms are a special and complex environment with different landforms, flora and fauna, and operation patterns compared to ordinary outdoor areas. Copying the standard procedures will inevitably lead to various malfunctions in the future. Next, NOKIN shares three real scenarios of farm accidents and the real pitfalls that countless farmers have encountered:
Large livestock constantly scratch and bump the thin light poles, causing them to tilt and the base to loosen. The lights cannot provide normal lighting.
Sheep and rodents chew on exposed cables, frequently causing power outages and short circuits, with high repair costs.
During the initial installation, there was no shading, and the surrounding fruit trees and forests gradually grew taller, blocking the solar panels. After 1-2 years, the batteries failed to charge fully and the lighting duration at night significantly decreased.
Many solar light installation tutorials on the market only explain the basic steps of digging holes, erecting poles, connecting wires, and fixing, completely ignoring the specific risks of farm installations. In this blog, NOKIN will focus on the core installation decisions that are unique to farms and missing from general tutorials. After reading this article, you will have a deeper understanding of the precise selection of light positions for farms, protection plans for livestock and machinery, methods for preventing lightning strikes in the wild, and the exclusive survey process before installation. This will help you prevent future malfunctions from their roots.
Pre-Installation Site Survey for Solar Lights on Farms
For outdoor installations of solar street lights, only considering sunlight and ground flatness is sufficient. However, for farm installations, it is necessary to complete the investigation of movement routes and the environment first. Farm dynamic interference factors are numerous and the hidden risks are high. Inadequate investigation will make all subsequent construction ineffective. The following 5 items are essential for the investigation.
Survey Agricultural Machinery Routes
Agricultural harvesters, seeders, transport vehicles, etc., have a height of over 4 meters and a large turning radius.
If the light pole is erected in the route of agricultural machinery, the turning blind zone or the operation width range will cause collisions and scratches, resulting in deformation of the light pole and damage to the equipment. The site selection must fully avoid fixed operation channels and turning areas for agricultural machinery.
Identify Livestock Activity Areas
Cattle, horses, sheep, etc., have fixed activity routes, gathering and resting areas, and scratching points.
These areas are high-risk damage zones for lights, light poles, and cables. Before installation, mark the high-frequency activity areas of livestock to avoid them from the source and reduce the risk of animal damage.
Check Underground Farm Facilities Before Excavation
Farms are filled with exclusive facilities, which are not present in ordinary outdoor scenarios. These include irrigation pipelines, underground water pipes, septic tanks, biogas tanks, and livestock waste pipelines.
Before excavating the foundation pit, precise positioning must be done. Blind excavation is prone to breaking pipelines and damaging facilities, causing leaks, gas leaks, and pollution accidents.
Plan for Future Tree Growth and Solar Panel Shading
Many solar light installations only consider the current sunlight conditions and ignore the growth characteristics of trees. In 3-5 years, the tree canopy will grow large and completely block the solar panels.
During the investigation, reserve shading space according to the size of the adult tree canopy. For lights in orchards and forest areas, choose open areas or reserve sufficient safety distances.
Assess Lightning Risks in Open Farm Areas
Farmlands and pastures are mostly open and unshaded areas, without tall buildings or trees for lightning protection. The lightning strike probability is much higher than in urban areas.
All solar light installation points in open areas must be included in lightning protection design before installation, rather than being remedied after installation.
3 Solar Light Installation Methods for Farms
Farms do not need to install lights blindly. The principle of cost optimization of "borrowing buildings first, then erecting poles" should be followed. Different installation methods have significant differences in applicable scenarios, hazards, and costs. The following are precise selection schemes.
|
Installation Method |
Applicable Farm Scenarios |
Unique Farm Hazards |
Cost Advantage (Per Unit) |
|
Building Wall Installation |
Farm entrances, livestock operation areas, warehouse perimeters, small passageways |
Roof eaves may shade solar panels; ammonia corrosion in animal sheds; insufficient wall load-bearing capacity; livestock may come into close contact |
Lowest — can save approximately US$80–150 in pole and foundation construction costs |
|
Independent Pole Installation |
Main farm roads, large pastures, fence lines, farm machinery parking areas |
Farm machinery collisions; livestock impact; soft-ground foundation settlement; higher outdoor lightning exposure |
Medium — includes pole and foundation construction costs |
|
Roof Installation |
Full-farm lighting, large-area supplementary lighting, unobstructed open roofs |
Insufficient roof load-bearing capacity; difficult high-altitude cleaning; dust accumulation may reduce charging efficiency; inadequate lightning protection |
High — may require additional structural reinforcement and lightning protection facilities |
Optimal decision sequence: Prioritize using existing grain silos and sheds wall installations to save construction and material costs; if no available buildings, then choose independent pole installation; roof installation is only an alternative for full-area supplementary lighting.
Solar Light Foundation Installation for Different Farm Ground Conditions
The farm ground has complex soil conditions, completely different from urban hardened pavement. The foundation construction methods and protection points for different ground types vary significantly, directly determining the lifespan of the lights.
Soft Farmland Soil
Soil is loose and has poor bearing capacity, prone to water accumulation and subsidence. The foundation pit depth needs to be deepened, the concrete foundation size needs to be increased, and additional base plates for reinforcement may be necessary to avoid light pole tilting and toppling.
Compact Grazing Land
Long-term being trampled by livestock and machine crushing, the ground is hard but has poor soil porosity. During construction, a drainage layer for the foundation needs to be well prepared to prevent water accumulation and foundation damage during rainy days, leading to loosening.
Rocky Ground
Excavation is difficult, and deep foundation pits cannot be dug. A drilling anchor fixation + fixed base construction method is required to ensure the stability of the light pole and prevent loosening and shaking.
Rodent Protection Around the Foundation
Livestock such as rats and hares are active in the farm and will gnaw at the soil around the foundation and hollow out the base layer, causing the light pole to become unstable over time.
During construction, a metal protective net can be added around the foundation perimeter to seal the gaps and prevent animals from digging and gnawing, protecting the foundation structure integrity.
Protect the Foundation During Concrete Curing
Farm agricultural operations are continuous, and the concrete foundation requires a 3-7-day curing period. During the curing period, no machine machinery should be crushed or livestock should be stepped on.
Before construction, a temporary passage route should be planned to avoid the construction area, preventing foundation deformation and cracking, and avoiding rework losses.
How to Protect Solar Lights from Livestock and Farm Animals
The biggest loss source for outdoor lights is weather, while the biggest damage source for farm lights is animals. Livestock bumping, animals gnawing, accidental touching and bumping are the primary causes of failure of farm solar lights, and must be targetedly protected.
Protect Underground Cables from Animal Damage
It is strictly prohibited to bury the cables directly in the soil! Sheep and rats are extremely prone to gnawing on exposed cables, causing short circuits and power outages.
All underground wiring must be fully protected by metal sleeves or armored cables, with tight interface sealing to prevent animal gnawing damage, solving the problem of cable damage from the root cause.
Protect Light Poles from Livestock Impact
Large livestock such as cows and horses habitually rub against walls and poles to scratch, long-term external force compression will cause the light pole to tilt and the base to loosen.
For light poles in high-frequency activity areas, rubber anti-bumping covers can be added, or the location can be selected to avoid the livestock's scratching points to reduce external damage.
Install Battery Compartments Above Livestock Reach
It is strictly prohibited to install the battery compartment on the ground! The battery on the ground is easily trampled by livestock, can be damaged by field water accumulation and moisture, and is prone to damage.
All battery compartments must be fixed overhead, higher than the livestock activity range, and avoid low-lying water accumulation areas for moisture and impact protection.
Adjust Sensor Height for Livestock Activity
For human sensing and light-sensitive lights, if the installation height is too low, livestock will frequently trigger false lighting when passing by.
This not only wastes electricity and shortens the night lighting duration, but also accelerates the aging of the lights. The installation height of the sensor should be raised according to the size of the livestock to be far away from the activity range of the animals.
Lightning Protection and Grounding for Farm Solar Lights
Many people have misconceptions: Solar lights operate independently and do not connect to the power grid, so they do not need lightning protection and grounding. This is a fatal mistake!
Understanding Lightning Risks on Farms
Lightning strikes can instantly break through the controller, battery, and light source, directly burning out the entire equipment. The cost of a single equipment damage can reach $100 - $300, and in severe cases, it can also cause safety hazards in the farm's electricity supply.
Grounding Practices for Farm Solar Lights
For solar lights in open areas of the farm, a grounding rod must be installed as a part of the construction: drive in a dedicated grounding electrode, make electrical potential connections for cables, and guide the lightning to quickly enter the ground.
When installing lights on walls, the metal casing of the equipment must be grounded uniformly to prevent static electricity accumulation and lightning strikes.
Why Off-Grid Solar Lights Still Need Lightning Protection
Even if a standalone solar system is off-grid and does not connect to the power grid, it still must have lightning protection and grounding. Lightning protection is not for protecting the power grid, but for protecting the lights, batteries, and controllers as a whole equipment, and it is a mandatory safety standard for outdoor installations in the farm.
Environmental Protection for Farm Solar Light Installation
The farm environment is dusty, highly corrosive, and prone to water accumulation. Ordinary outdoor lights cannot be adapted to this environment. Specific installation details need to be upgraded to extend the equipment's lifespan.
Ammonia Corrosion Protection in Livestock Sheds
Livestock breeding areas continuously produce ammonia gas, which corrodes the metal components and sealing rubber strips of the lights, causing the equipment to rust, get waterlogged, and fail.
Installing lights around the livestock shed requires using stainless steel fixing accessories and prioritizing high-sealing grade lights (IP66 or above) to avoid corrosion and damage.
Dust and Solar Panel Cleaning
The farmland and livestock breeding areas have a large amount of dust, which accumulates on the surface of the solar panels over time, significantly reducing the charging efficiency.
When installing, do not blindly raise the panel height. Reserve space for manual cleaning to avoid installing it in high places or corners, which may make it impossible to clean and maintain later.
Waterproof Protection in Farm Washing Areas
Livestock sheds and breeding platforms require frequent high-pressure water jets for cleaning. The water vapor and strong water impact force are large.
The lights in this area must be installed at a higher height, strictly following waterproof standards, sealing the connection interfaces to prevent water ingress and short circuits.
Solar Light Installation, Setup, and Maintenance on Farms
Most farms do not have professional electricians. After the solar lights are installed, standardized debugging and simple self-checking instructions are crucial for ensuring the long-term stable operation of the lights.
Adjust Sensors and Lighting Modes
The key is to teach users how to remotely adjust, adjust the sensitivity of the sensor, and set the timing switch. Adjust the lighting mode according to the farm's schedule and the nocturnal activity patterns of the livestock to balance lighting effect and power-saving requirements.
Check Winter Charging Performance
During winter, the duration of sunlight is shorter and the light intensity is weaker, so it is necessary to debug the winter charging mode in advance to adapt to the weak light charging environment and ensure the normal lighting duration at night.
Farm Solar Light Maintenance Checklist
Daily check: The solar panel is free of dust and has no obstructions, with a clean and transparent surface;
Night check: The light is sensitive to the sensor, without flickering or unexpected power-off problems;
Quarterly check: Check the stability of the light pole, the integrity of the cables, and the grounding for looseness;
Post-rain check: Check if the foundation has water accumulation, if the equipment has water ingress, and if the accessories are rusted.
7 Common Solar Light Installation Mistakes on Farms
Summarize the root causes of many solar light installation failures in farms, and follow the avoidance checklist throughout the construction process:
Incorrect Light Pole Location
Placed within the turning radius of agricultural machinery or the operation path, easily damaged by collisions;
Unprotected Underground Cables
Not protected by metal conduits, bitten by animals, and frequently short-circuited and power-off;
Ignoring Future Tree Growth
Only considering current sunlight, the charging efficiency drops sharply due to tree crown shading in the future;
Installing Solar Panels Too High
Unable to clean regularly, dust accumulates, and there is insufficient weak light charging over time;
Ignoring Corrosion Protection in Livestock Sheds
No stainless steel fittings were used, and the sealing level was low, resulting in corrosion and damage by ammonia gas;
Skipping Lightning Protection and Grounding
There were no lightning protection measures in the open area, and lightning strikes could easily burn down the entire equipment;
Installing the Battery Compartment on the Ground
It was prone to water accumulation and was easily touched and stepped on by livestock, causing extremely high equipment failure rates.
Conclusion: A Practical Installation Sequence for Farm Solar Lights
The installation of solar lights on the farm has a completely different core logic from ordinary outdoor installations. The correct installation sequence is always: first, survey the movement paths and animal risks → then, choose the most suitable installation method → ensure protection and lightning protection → finally, complete the installation of the lights. If the sequence is reversed, even if the construction is very standardized, there will still be continuous failures in the later stage, increasing the cost of maintenance and replacement.
If you want to complete the installation of solar lights on the farm without any mistakes and avoid all scenarios of risks? Please contact NOKIN at any time and inform us of your farm scenario (livestock shed, enclosure, field roads, equipment site), and we will provide you with a one-on-one free installation plan and site planning suggestions.