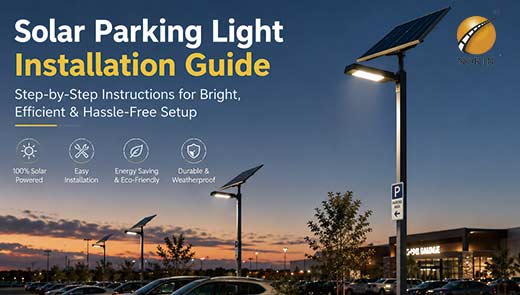
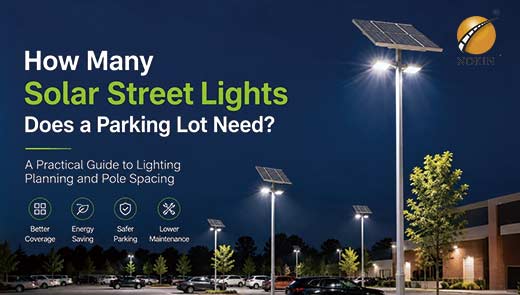
Solar Parking Light Installation Guide: Foundation, Pole Height, and No-Trenching Construction
Aug 13, 2026
Why Is Solar Parking Light Installation Simpler Than Grid-Connected Lighting?
The installation process for traditional grid-connected parking lights is cumbersome and complex, a major pain point for many property managers and contractors. The entire construction process includes site registration, power approval, road excavation, pipeline laying, backfilling and repair, and power connection and commissioning, typically taking 4-8 weeks.
In contrast, solar parking light installation offers significant advantages. Based on a no-trenching core construction model, it eliminates the need for underground cable laying and connection to the municipal power system. The core procedures are only foundation treatment, pole assembly, and equipment commissioning.
From a cost and efficiency perspective, a single solar street light pole can save $1,000-$2,000 in wiring costs, and the entire construction process involves zero traffic interruption and requires no power approval, greatly reducing the operational impact of commercial parking lot construction.
However, simplified construction does not mean it can be installed arbitrarily. The three core parameters—foundation pouring accuracy, pole height selection, and wind load compatibility—directly determine the lighting effect, lifespan, and resilience of solar street lights. Errors in these parameters can lead to extremely high costs for subsequent rectification.
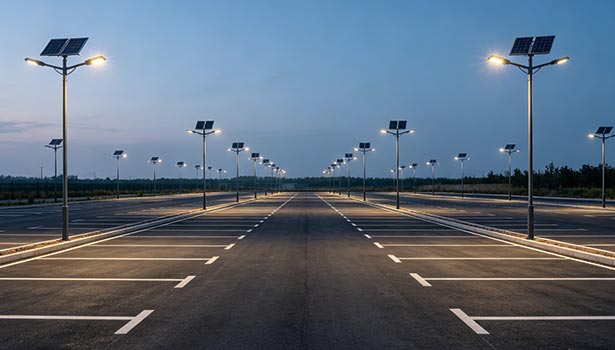
Step 1: Conduct a Site Survey Before Solar Parking Light Installation
Before Installation A 30-minute site survey before formal construction is crucial to avoiding 80% of installation problems. For scenarios with open but easily obstructed parking lots, multiple underground pipelines, or unobstructed winds, four key items need to be checked to accurately match the subsequent construction plan.
Assess Solar Panel Shading and Sunlight Conditions
The power generation efficiency of solar street lights depends entirely on sunlight conditions, making it the primary point of verification during construction. It is essential to record the timing and extent of shading from trees, buildings, and elevated structures around the parking lot.
Prolonged localized shading will directly lead to insufficient power generation from the photovoltaic panels, halving the lamp's runtime, and making it highly susceptible to lampouts during cloudy or rainy weather. It is recommended to use a professional light metering app on a mobile phone, along with a shading recorder, to mark the effective sunlight duration throughout the day.
Verify Soil and Geological Conditions
The bearing capacity of different soil types varies greatly, directly determining the construction standards of the solar light pole foundation. Common soil types are divided into three categories: sandy soil, clay, and rock. Soft soil requires a deeper and wider foundation, while hard rock layers can simplify the pouring process.
Assess Wind Load Requirements for Solar Light Poles
Solar panels installed at the top of the light pole form a natural windward surface, equivalent to a "high-altitude sail." In open parking lots with no obstructions, the impact of wind is far greater than on park roads.
In coastal areas, high-altitude areas, and open windy areas, it is necessary to upgrade the wall thickness of the light pole and the specifications of the foundation to prevent the light pole from tilting or collapsing during typhoons and strong winds.
Inspect Underground Utilities Before Foundation Excavation
Although solar street lights support trenchless construction and do not require cable laying, small-scale excavation work is still required at the foundation location. The location of underground pipelines, cables, and water supply and drainage pipes must be inspected in advance to avoid the risk of facility damage.
Step 2: Choose the Right Solar Light Pole Foundation – Anchor Base vs. Direct Burial
There are two main methods for fixing the foundations of solar parking lot street lights: anchor base and direct burial. The construction process, applicable scenarios, and maintenance costs of these two methods differ significantly, requiring specific selection for commercial parking lot applications.
The following table clearly compares the core differences between the two pole erection methods to suit different parking lot construction needs:
|
Comparison Dimension |
Anchor Base |
Direct Burial |
|
Construction Process |
Concrete base pouring → Anchor bolt pre-embedding → Bolt fixing of pole |
Point excavation → Direct burial of pole → Layered backfilling and compaction |
|
Applicable Scenarios |
Commercial parking lots; pole heights over 8 m; areas with high wind loads; permanent lighting projects |
Pole heights under 6 m; temporary parking lots; simple projects with solid soil |
|
Replacement and Maintenance |
Removable; individual replacement of pole and equipment; no damage to the foundation or road surface |
Requires complete pole removal; significant construction disruption; higher maintenance costs |
|
Construction Costs |
Slightly higher; requires customized templates and high-strength concrete pouring |
Lower; simpler process, less material consumption, and shorter construction cycle |
Which Foundation Type Is Better for Commercial Parking Lots?
Prioritize Anchor Base. Commercial parking lots typically have a pole height of over 8 meters, coupled with large-area photovoltaic panels, resulting in a higher wind resistance coefficient. Anchor base provides stronger stability and facilitates later equipment maintenance and lighting upgrades, meeting long-term commercial needs.
Step 3: Build the Solar Street Light Foundation Correctly
The foundation is the core load-bearing structure of a solar street light, directly determining the pole's verticality and wind resistance. Construction must strictly adhere to industry standard formulas and concrete construction specifications, avoiding any guesswork.
Direct Burial Depth Calculation for Solar Light Poles
General empirical formula for burial depth: Direct burial depth ≈ Pole height × 10% + 2 feet (600mm). Example: For a 30-foot high pole, the standard burial depth should be 5 feet to ensure the pole is stable and does not tilt.
Concrete Strength Requirements for Solar Light Pole Foundations
Concrete strength is crucial for foundation durability. For commercial parking projects, the minimum concrete grade should be 5000 PSI. In coastal areas, windy regions, and other harsh environments, it is recommended to upgrade to 6000-7000 PSI to improve weather resistance and load-bearing capacity.
Anchor Bolt Layout and Alignment Requirements
The anchor bolts are arranged in a standard four-bolt square layout. The bolt circle size must precisely match the flange at the bottom of the light pole; a deviation exceeding 2mm will result in flange misalignment and bolt instability.
The verticality and horizontality of the anchor bolts must be calibrated throughout the pouring process. Once the concrete hardens, deviations cannot be corrected, directly leading to light pole tilting, uneven stress, and easy damage later.
Foundation Requirements for Different Soil Conditions
Sand and soft soil areas: The foundation base needs to be deepened and widened, with additional steel reinforcement to prevent foundation settlement and light pole tilting.
Rock strata areas: Large-scale excavation is unnecessary; rock anchoring technology can be used to fix the anchor bolt base, saving construction costs and time.
Common Solar Light Pole Foundation Rework Mistakes
Anchor bolt template misalignment and spacing deviation are the most common rework problems. Foundation pouring is an irreversible process; once an error occurs, it must be broken up and re-poured, which is time-consuming, labor-intensive, and the most costly mistake in the entire installation project.
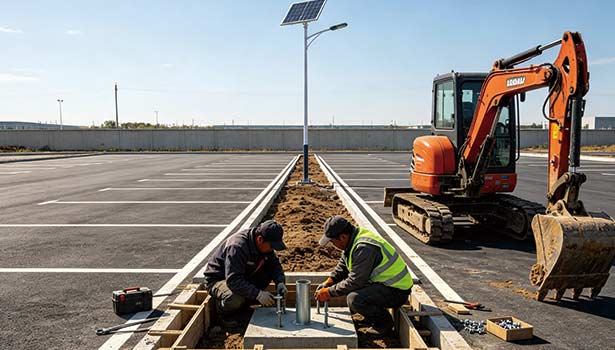
Step 4: Assemble and Install the Solar Light Pole and Fixtures
The assembly of solar parking lot lights follows the core principle of "ground-based assembly and overall hoisting." Compared to piecemeal assembly at height, this improves installation accuracy, avoids the risks of working at height, and significantly increases construction efficiency.
Ground-Based Assembly Before Pole Hoisting
Complete the entire equipment assembly on the ground in advance: fix the light arms, install the lights, adjust the solar panel brackets, connect the internal waterproof cables, and tighten the flange bolts. After the entire equipment is assembled, hoist it as a whole.
Solar Light Pole Hoisting and Installation Safety
For poles over 8 meters high, a crane or aerial work platform must be used for hoisting. The pole must be secured with a traction rope throughout the process to prevent rotation or displacement during hoisting.
After the light pole is anchored, tighten the nuts in stages. Use a level to check the verticality throughout the process to ensure the vertical deviation of the pole is controlled within the industry standard range, avoiding later stress imbalance.
Solar Panel Orientation and Tilt Angle for Parking Lot Lights
For all parking lot projects in the Northern Hemisphere, the photovoltaic panels are uniformly installed facing south, with a deviation angle not exceeding ±5° to avoid power generation loss.
The tilt angle is adapted to the local latitude: It can be laid horizontally in equatorial regions; in mid-to-high latitude regions, a tilt angle of 25°-35° is set, and in areas with weak sunlight in winter, the angle can be appropriately increased by 10°-15° to ensure stable power generation throughout the year.
Step 5: Compare Solar vs. Grid-Connected Light Installation Time
No-Trenching is the core differentiating advantage of solar parking lot lights compared to traditional electric grid lights. It not only saves costs but also significantly shortens the construction period, reduces the impact of construction on commercial sites, and meets the needs of parking lot construction without interrupting operations.
Traditional Grid-Connected Street Light Installation Timeline
Traditional Electric Grid street lights: Site survey → Power approval and filing → Road trenching → Pipeline laying → Backfilling and repair → Power connection and commissioning → Acceptance and delivery. The overall construction period is 4-8 weeks, with cumbersome approval processes and severe road damage.
Solar Parking Light Installation Timeline
Solar No-Trenching street lights: Site survey → Foundation pouring (curing for 24-48 hours) → Overall pole assembly → Equipment commissioning → Acceptance and delivery. The construction period for a single batch is only 2-3 days.
Benefits of No-Trenching Solar Parking Light Installation
Most commercial parking lots have asphalt-paved surfaces. No-ditch construction eliminates the need to damage the existing road surface and subsequent road repairs, further reducing construction costs.
Solar parking light installation does not disrupt vehicle or pedestrian traffic, requires no long-term construction barriers, and does not affect the normal operation of the parking lot. It is perfectly suited for high-frequency parking lots in shopping malls, industrial parks, and office buildings.
Does No-Trenching Installation Mean Zero Excavation?
No-ditch installation does not mean zero civil engineering work. Small-scale excavation and concrete pouring are still required at the foundation points. Site locations must be planned in advance and staggered with water and electricity lines to avoid construction oversights.
Step 6: Commission and Test Solar Parking Lot Lights
Standardized commissioning and acceptance after the solar parking light installation is crucial for preventing later malfunctions and ensuring lighting effects. It is also a core part of project delivery and requires strict adherence to the three-check standard.
Initial Power-On and Charging System Inspection
During the day, observe the charging status of the photovoltaic panels and confirm that the controller's charging indicator light is on normally. In the evening, after natural light weakens, the lights should automatically start and illuminate, and the light control sensor function should respond normally.
Three Core Solar Parking Light Acceptance Checks
Brightness Check: Measure the actual road surface illuminance to match parking lot lighting design standards, avoiding issues such as excessive darkness in certain areas and uneven light distribution.
Battery Life Check: Test continuous rainy/cloudy conditions to confirm the battery storage system starts normally, ensuring normal lighting for 3-7 days of rainy/cloudy weather.
Function Check: Verify additional functions such as PIR human body sensing, timed on/off switching, and remote control, ensuring all parameters function correctly.
Record Key Solar Street Light Performance Parameters
After acceptance, record core data such as lamp brightness, charging efficiency, battery life, and sensing parameters to establish an equipment maintenance file, providing a baseline for future regular maintenance and troubleshooting.
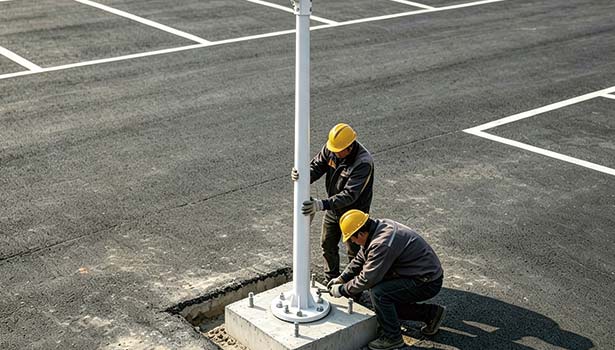
Step 7: Top 5 Solar Parking Light Installation Mistakes to Avoid
Based on numerous commercial parking lot lighting project cases, five of the most frequent and costly installation errors have been identified, which all construction teams must avoid:
Anchor Bolt Template Misalignment
The bolt ring size does not match the flange, preventing lamp post installation and requiring foundation demolition and rework, which is time-consuming and labor-intensive.
Unchecked Solar Panel Shading
Ignoring obstructions from surrounding trees and buildings leads to insufficient power generation from the lights, halving nighttime illumination and causing long-term unstable lighting.
Insufficient Concrete Curing Time
Erecting poles before the concrete is fully cured results in insufficient foundation bearing capacity, leading to base cracking and pole tilting later.
Incorrect Solar Light Pole Height
Using 6-meter poles instead of standard 8-meter poles in parking lots creates blind spots and insufficient illuminance, or using high poles with undersized lights wastes solar energy.
Ignoring Wind Load Requirements
In windy and coastal areas, failure to reinforce the foundation and poles increases the risk of pole collapse during typhoons and strong winds, posing a significant safety hazard.
Conclusion: Key Considerations for Solar Parking Light Installation
The core installation logic of solar parking lot lights is to eliminate trenching for efficiency, ensure a solid foundation, and ensure appropriate pole height. Compared to traditional grid lights, they have a shorter construction period, lower cost, and less impact on commercial sites.
Meanwhile, standardized foundation pouring, precise pole height selection, and rigorous on-site surveys and commissioning are crucial for ensuring the long-term stable operation of solar street lights. Simple construction does not equate to haphazard construction.
Get Professional Solar Parking Light Installation Support
For professional engineering technical support, please submit an inquiry form to receive one-on-one installation guidance, solution adaptation, and technical Q&A services from solar street light manufacturer NOKIN, avoiding potential construction problems and ensuring the project meets acceptance standards on the first attempt.