How Long Does It Take to Install A Solar Street Light
When purchasing solar street lights, one of the most concerned issues for purchasers is: How long does it take to install solar street lights? In fact, the installation time of solar street lights is not a fixed value, but a dynamic variable affected by multiple factors such as system type, site conditions, and staffing. According to industry statistics, the installation time of solar street lights of the same specifications in different scenarios can vary by 3-5 times, and there are many technical details and practical experience behind this difference.
Split Solar Street Lights Installation Process and Duration
Foundation Pit Excavation
Mechanical pit excavation
A medium-sized excavator only takes 2-3 minutes to excavate a standard foundation pit (about 1.5 meters deep and 0.8 meters in diameter) under normal soil conditions. This method is particularly suitable for large-scale projects or hard formations, and can complete the construction of a large number of foundation pits in a short time, gaining valuable time for subsequent processes.
Manual pit excavation
When a single person uses tools such as shovels to excavate foundation pits, the time consumption will increase significantly, and it usually takes about 1 hour to complete the foundation pit of the same specifications. The efficiency of manual excavation is not only affected by the operator's physical strength, but also closely related to the nature of the soil. Excavation in sandy soil is relatively easy, but when encountering clay layers or strata containing gravel, the time consumption will be further extended.
Key technical points
The depth of the foundation pit usually needs to reach more than 10% of the height of the lamp pole to ensure sufficient stability.
Concrete Foundation Pouring
The core goal of pouring the concrete foundation is to provide a solid support base for the lamp pole to ensure that it can remain stable under various climatic conditions.
When operating alone, the mixing ratio of cement, sand and gravel needs to be carried out carefully, usually in a ratio of 1:2:3. The concrete is then poured into the foundation pit and leveled, and the whole process takes about 20 minutes. It should be noted that the solidification process of concrete takes a certain amount of time. Under normal temperature conditions, it usually takes 24-48 hours to reach sufficient strength.
Circuit Connection
Circuit connection is one of the most technical links in the installation of solar street lights. The circuits of solar panels, batteries and LED lamps need to be correctly connected, and waterproof and insulated treatment should be done at the same time.
When a skilled technician is making circuit connections, it usually takes about 20 minutes to complete the wiring of a lamp. During the operation, the positive and negative pole markings must be strictly followed to avoid reverse polarity. Using pre-wired terminals or waterproof quick connectors can significantly shorten the wiring time, and the efficiency can be increased by more than 10% compared to the traditional wire stripping and winding method. At the same time, numbering and marking all cables before wiring can effectively reduce the time for troubleshooting.
Fixing the Light Pole
Mechanical assistance
Using a crane with two workers to operate, the lifting and fixing of the light pole can be completed efficiently, and the whole process only takes 5-7 minutes. Mechanical assistance not only improves efficiency, but also ensures that the verticality error of the light pole is controlled within a very small range.
Manual fixing
It takes more manpower and time to completely rely on manual fixing of the light pole. It usually takes 4-5 workers to cooperate and takes 15-20 minutes to complete. When operating manually, special attention should be paid to safety issues, and tools such as levelers should be used to repeatedly calibrate to avoid tilting the light pole.
Integrated and Split Solar Street Lights Installation Time Analysis
Differences in System Structure Determine the Complexity of Installation
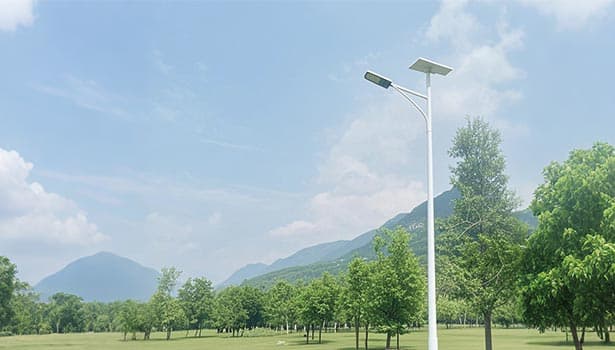
Solar street lights are mainly divided into two structural types: integrated and split. The different design concepts directly lead to significant differences in installation process and time consumption. The integrated system integrates solar panels, batteries and LED lamps in a compact unit, greatly simplifying the number of components and connection relationships. The split system sets these components separately, usually requiring the solar panel to be installed on the top of the light pole, the battery to be placed in a special box at the bottom of the light pole, and the lamp to be installed at a suitable height of the light pole.
This structural difference makes the installation complexity of the two solar street light systems show a clear differentiation. The installation of the integrated solar street light is more like an "assembly" operation, while the split solar street light requires more "systematic" integration, which is directly reflected in the difference in installation time.
Quantitative Comparison of Installation Process and Time Consumption
In order to more intuitively show the difference in installation efficiency between the two solar street light systems, we make a quantitative comparison through the following table:
|
Installation Stage |
Integrated Solar Street Light |
Split-Type Solar Street Light |
|
Component Preparation |
No disassembly required; transported as a whole |
Solar panel, battery, and lamp must be transported separately |
|
Pole Installation |
10–15 minutes (2-person team) |
15–20 minutes (3-person team) |
|
Component Connection |
5–8 minutes (minimal bracket installation and wiring) |
20–30 minutes (multiple cable connections and component fixing) |
|
Circuit Debugging |
3–5 minutes (built-in system auto-detection) |
10–15 minutes (manual inspection of each connection) |
|
Total Installation Time |
15–20 minutes (single person) / 5–10 minutes (2-person team) |
1.5–2 hours (single person) / 40–60 minutes (3-person team) |
Applicable and Time Cost Trade-Off
|
Comparison Dimension |
Integrated Solar System |
Split-Type Solar System |
|
Installation Time Advantage |
Significant reduction in installation time |
Longer installation time due to separate components |
|
Environmental Flexibility |
Limited by fixed integrated design |
Allows flexible positioning of solar panels and lamp poles |
|
Suitability for Special Conditions |
Less adaptable in complex environments |
Ideal for locations requiring optimal sunlight angle and specific pole height |
|
Time & Labor Cost Efficiency |
Ideal for small-scale or urgent projects |
Better suited for large-scale or complex municipal projects |
|
Long-Term Operational Efficiency |
May be limited by non-adjustable design |
Customizability can improve long-term performance |

Factors Affecting the Installation Time of Solar Street Lights
Site Preparation
Obstacle removal:
The removal of obstacles such as trees, bushes, and old foundations requires additional time. It may take more than 30 minutes to cut down a tree with a diameter of 20 cm and clean the root system.
Ground treatment:
The removal of asphalt or concrete pavement requires the use of professional equipment, and the processing time per square meter is about 15-20 minutes.
Material transportation:
In remote areas or sites with inconvenient transportation, material transportation time may account for more than 20% of the total installation time.
Optimization plan:
Conduct site survey 3-5 days in advance and develop a detailed site preparation plan. Use portable hydraulic breakers to treat hardened ground, which is more than 3 times more efficient than traditional tools. For large-scale projects, a synchronous construction method in different regions can be adopted to shorten the overall site preparation time.
Foundation Construction
Traditional concrete foundation
Although the material cost of traditional concrete foundation is low, it needs to wait for 24-48 hours of curing time, which is a time cost that cannot be ignored in the project cycle.
Prefabricated base
The prefabricated base is produced in advance in the factory, and only hoisting and fixing are required on site, which greatly reduces the waiting time on site. The on-site installation time of a prefabricated base is usually no more than 30 minutes, plus the hoisting preparation work, the overall time is about 1 hour, which is much lower than the waiting time of traditional concrete foundation.
Component Assembly Complexity
Solar panel angle adjustment
The split solar street light needs to accurately adjust the tilt angle of the solar panel according to the local latitude, and each fine-tuning may take 5-10 minutes.
Battery fixing
Under special conditions, such as high humidity or high temperature areas, the battery may require additional protection measures, which will increase the installation time by 10-15 minutes.
Lighting height adjustment
Some projects have special requirements for the height of the lighting fixtures, which require multiple calibrations, and each adjustment takes about 5 minutes.
Electrical Safety Test
Traditional system test
The traditional split solar street light needs to detect the connection of solar panels, batteries, lamps and controllers section by section, and the whole process takes about 10-15 minutes per lamp.
Intelligent system test
The integrated solar street lights with intelligent control systems usually have automatic detection functions. You only need to start the test program through a mobile phone APP or special equipment, and the system will automatically complete the detection and analysis of various parameters. The whole process only takes 3-5 minutes per lamp. This intelligent test not only saves time, but also provides a more comprehensive test report for subsequent maintenance.
Climatic Conditions
Rainy days
Rainwater can make the soil muddy, increase the difficulty of foundation pit excavation, and affect the solidification quality of concrete. In moderate rainy weather, the installation efficiency may drop by more than 30%, and heavy rain may cause construction to be completely suspended.
Strong winds
Strong winds exceeding level 6 will affect the safety of the light pole hoisting. At this time, additional protective measures need to be taken, or the hoisting operation needs to be suspended, which will increase the time of related links by more than 50%.
High temperature environment
In high temperature weather, the solidification speed of concrete will be accelerated. Although this can shorten the waiting time for the foundation, it will also increase the difficulty of concrete proportioning, and the strength of the foundation may be affected if you are not careful.
Low temperature environment
When the temperature is below 5℃, the solidification time of concrete will be extended to more than 72 hours, which will significantly increase the project cycle. At the same time, low temperature will also affect the performance of the battery, and insulation measures need to be taken to increase the installation time.
Coping strategies
During the project planning stage, take full account of the local climate characteristics and arrange the construction time reasonably. For example, in rainy areas, try to choose the dry season for installation; in cold areas, use specially formulated antifreeze concrete to shorten the solidification time.
Solar Street Lights Installation Common Errors and Time-Consuming Traps Analysis
Site selection errors
Site selection is the most easily overlooked but extremely important link in the installation of solar street lights. Many projects fail to get enough sunlight for solar panels due to improper site selection in the early stage, thus affecting solar street light system performance. What's more serious is that once the site selection problem is found, it is often necessary to re-excavate the foundation pit and relocate the light poles, which will cause a lot of time waste.
Preventive measures: Use professional solar path finder tools to evaluate the site selection and ensure that the installation location has at least 6 hours of direct sunlight per day. In the planning stage, fully consider seasonal factors such as tree growth and building shadows to avoid possible shading problems in the future.
Reverse polarity
Reverse polarity is one of the most common electrical errors in solar street light installation. Although the problem itself is not complicated, the troubleshooting and repair process may consume a lot of time. When the circuit polarity is reversed, the system may show phenomena such as no charging, no light, or abnormal heating. The technician needs to check the line connection section by section, which takes an average of 30 minutes per location.
Solution: Before wiring, clearly mark all cables with clear colors, usually red for positive and black for negative. At the same time, mark the polarity connection method in detail on the circuit diagram to facilitate the installation personnel to compare and operate. After the installation is complete, use a multimeter to check the polarity and ensure that the connection is correct before turning on the power.
Weak foundation
A weak foundation is the main reason for the tilt or even collapse of solar street lights after installation, which will not only affect the lighting effect, but also cause safety hazards. When the light pole is found to be tilted, it is usually necessary to re-pour the foundation, which will cause a delay of 1-2 days in the construction period. Common causes of weak foundation include insufficient foundation pit depth, improper concrete mix ratio, and irregular foundation treatment. This problem is more prominent in sandy soil or soft soil layers because the bearing capacity of the foundation is relatively low.
Solution: Strictly control the depth and size of the foundation pit according to the design requirements. Generally, the depth of the foundation pit should not be less than 10% of the height of the solar street light pole. Use a standard concrete mix ratio (cement: sand: gravel = 1:2:3) and ensure that it is vibrated and compacted. In soft soil layers, crushed stone cushions or piling can be used to enhance the bearing capacity of the foundation.
Solar Street Light Installation Time Estimation Model
Split Solar Street Light Estimation Model
Single lamp foundation time = foundation pit excavation time (2 minutes to 1 hour) + foundation pouring time (20 minutes) + circuit connection time (20 minutes) + lamp pole fixing time (5 to 20 minutes)
Note: It is necessary to add the site preparation coefficient (ordinary site × 1.0, complex site × 1.5 to 2.0) and climate correction coefficient (suitable climate × 1.0, extreme climate × 1.2 to 1.8).
Integrated Solar Street Light Estimation Model
Single lamp foundation time = lamp pole fixing time (5 to 10 minutes) + component connection time (5 to 8 minutes) + debugging time (3 to 5 minutes)
Note: For large-scale installation (> 10 lamps), it can be multiplied by the team collaboration efficiency coefficient (2-person team × 0.6, 3-person team × 0.4).
Conclusion
The installation time management of solar street lights is essentially a balancing game between efficiency and performance. In the future, with the improvement of photovoltaic module integration and the popularization of intelligent installation tools, the installation of solar street lights will develop in the direction of "install and use".
By converting the installation time from the vague "days" to the precise "hour" level management, it can not only improve the competitiveness of the project, but also promote the transformation of the role of solar street lights from "alternative energy" to "mainstream lighting", and ultimately achieve the dual optimization of economic and environmental benefits.

