How to Select the Best Site and Properly Install Solar Street Lights
Jun 19, 2025
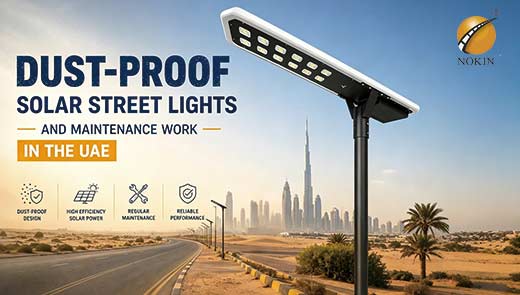
In today's world, where energy conservation and environmental protection are becoming increasingly important, solar street lights are widely used in urban streets, rural roads, parks, and scenic areas due to their advantages of zero carbon emissions, reduced electricity costs, and easy installation. However, to fully utilize the efficiency of solar street lights, it is crucial to choose the right installation location and install them correctly. This article will provide a detailed explanation of how to select the optimal installation location and properly install solar street lights, as well as share common troubleshooting methods and scientific maintenance techniques.
How to Choose the Right Location for Solar Street Lights?
Road and Traffic Considerations
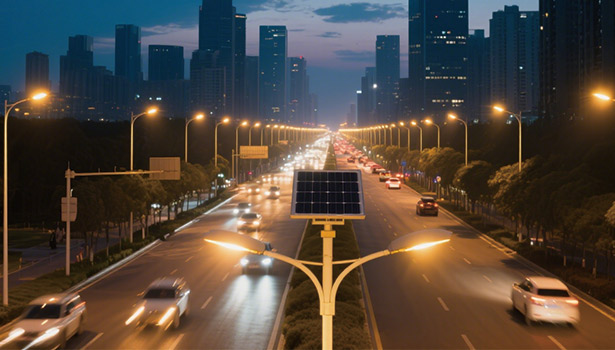
Road width, traffic flow, and pedestrian volume are key factors in determining the installation location and spacing of street lights. Different road conditions require different installation strategies. The following are specific reference standards:
|
Road Type |
Road Width (m) |
Lamp Spacing (m) |
Applicable Scenarios |
|
Narrow Alley |
<6 |
6-8 |
Residential area roads, lanes |
|
Standard Street |
6-12 |
8-10 |
Secondary city roads, main roads in towns |
|
Wide Main Road |
>12 |
10-12 |
Major urban roads, auxiliary roads of highways |
Reasonable street light spacing not only ensures uniform road lighting but also safeguards the safety of nighttime driving and pedestrians, preventing traffic accidents caused by insufficient lighting.
Clearance from Other Structures
When selecting installation locations, it is essential to maintain a safe distance from overhead infrastructure such as high-voltage power lines and cables. Installing street lights beneath high-voltage lines not only poses an electric shock risk but may also disrupt normal operation due to electromagnetic interference. Additionally, underground utilities such as cables, natural gas pipelines, and water supply/drainage pipes must be thoroughly inspected. If construction cannot be avoided in restricted areas, prior approval must be obtained from relevant authorities such as power, gas, and water utilities before installation to prevent damage to underground infrastructure and potential safety incidents.
Environmental Considerations
Solar street lights should be avoided in low-lying areas prone to water accumulation. Prolonged water accumulation can corrode the lamp base, batteries, and other components, shortening the equipment's lifespan. The ideal installation location is an area with firm soil. If encountering soft soil, the depth of the foundation pit should be increased accordingly to ensure the stability of the street light and prevent it from tilting or collapsing due to soil settlement.
Sunlight Assessment
Adequate and unobstructed sunlight exposure is the foundation for the efficient operation of solar street lights. The south, east, and west sides of the installation area should be as open as possible to ensure that the solar panels receive unobstructed direct sunlight between 9 AM and 3 PM. Prior to installation, the length and width of the road, as well as the height and distance of nearby buildings, trees, and other obstructions, should be measured to serve as the basis for system design, ensuring that the solar panels receive sufficient sunlight.
Latitude and Orientation
The orientation and tilt angle of the solar panels directly affect light absorption efficiency. In the Northern Hemisphere, solar panels should be installed facing south; in the Southern Hemisphere, they should be installed facing north. Adjusting the tilt angle according to local latitude allows the solar panels to capture more sunlight throughout the year. For example, in regions near the equator, the ideal tilt angle for solar panels is 15°–20°; as latitude increases, the tilt angle should also be correspondingly increased.
How to Install Solar Street Lights?
Foundation Pouring
The battery of an integrated solar street light is integrated into the lamp post or fixture, eliminating the need for underground installation. This simplifies construction, reduces the risk of battery damage from adverse underground environments, and saves installation space and costs. Before installation, a detailed survey of soil conditions must be conducted. If the top 1 square meter of soil is loose, the foundation pit depth must be increased. Additionally, ensure the excavation area has no underground utilities and is not obstructed by buildings, trees, etc., to provide optimal sunlight exposure for the solar panels.
After determining the lamp post location, although no underground battery box is required, space and pathways for wiring connections must be reserved. Dig a 1-square-meter foundation pit, place the embedded components at the center, lay PVC conduit pipes, and adjust the height of the embedded components so that the foundation surface is level with the ground, with the top of the anchor bolts either level with or 50 millimeters above the ground. Finally, pour C20 concrete and compact it with a vibrating rod to enhance the structural strength of the foundation and ensure the stability of the street light.
Solar Panel Installation
Component Inspection and Wiring: Before installation, carefully verify the specifications, power rating, and peak operating voltage indicated on the solar panel nameplate to ensure full compliance with design requirements. Additionally, carefully inspect the component surfaces for cracks, damage, or other defects to avoid using components with defects. Due to the compact structure of integrated street lights, wiring must be done with particular attention to the rationality of the circuit layout. Plan the circuit routing in advance to ensure convenient installation and maintenance in the future.
Waterproofing and Mounting: When connecting the solar panels, open the junction box, securely solder or crimp the wires to the terminals, tighten the waterproof nuts at the cable exits, and ensure the junction box cover is tightly sealed to prevent water ingress. Use appropriately sized bolts, nuts, and washers to secure the solar panels to the mounting brackets. Insert the bolts from the outside inward, place the washers in sequence, and tighten the nuts. To maintain the overall aesthetics and structural stability of the integrated street light, ensure that the components are installed flat and securely during the mounting process to prevent tilting or loosening.
Battery Installation
The battery of the integrated solar street light is already integrated into the lamp body and does not require underground installation. However, during installation or maintenance, if battery removal or installation is involved, careful handling is still required. When moving the battery, handle it gently to avoid severe vibrations or impacts. During installation, ensure the battery is securely fixed in its designated position inside the lamp body. When connecting the battery cables, use copper washers to enhance conductivity and ensure a secure connection. Ensure the battery output cables are routed through PVC pipes, and properly insulate the cable ends to prevent short circuits. Additionally, organize the cables around the battery to avoid tangling or compression, ensuring the internal wiring remains neat and orderly.
Lamp Installation
Mounting Components and Lamp Head: Secure the solar panel and bracket assembly to the lamp post. Before installation, confirm the correct orientation of the components to ensure the solar panel faces south when the lamp post is upright. If the lamp arm and lamp post are separate structures, first install the lamp head on the lamp arm, then secure the lamp arm to the lamp post; if the lamp arm is already welded to the lamp post, this step can be omitted. Next, route the wires into the control box at the base of the lamp post. During the wiring process, take care to protect the outer insulation of the wires to prevent scratches or damage, and leave sufficient wire length for subsequent connection to the controller.
Pre-lifting inspection: Before lifting the lamp post, conduct a thorough inspection of all components. Confirm that the solar panels, lamp head, brackets, etc., are securely installed with no loosening or displacement; Re-confirm the correct orientation of the solar panels; check that the lamp position is accurate. Connect the positive and negative terminals of the light source to the battery terminals and test whether the light source can illuminate normally. Since integrated street lights have high integration and strong interdependence between components, any issue in any part may affect overall operation. Therefore, ensure all system components function normally before proceeding with lifting.
Post-lifting installation: After the lamp post is lifted into position, immediately adjust its vertical alignment to ensure the street light stands upright without tilting, then tighten the foundation flange anchor bolts. Open the control box at the bottom of the lamp post, route the wires from the solar panels, light source, and battery into the control box, and connect them to the controller in the following order: battery first, then load, and finally the solar panels. During the connection process, strictly ensure the correct polarity of the wires to prevent damage to the controller caused by reversed connections.
System commissioning: During commissioning, closely monitor the status of the controller's indicator lights to determine if the system is operating normally. Set the controller's timing switch, brightness adjustment, and other parameters according to actual usage requirements. For example, adjust the street light's on/off times flexibly based on the day/night duration of different seasons; set different brightness modes for different time periods based on changes in pedestrian and vehicle traffic. After commissioning is complete and all functions are confirmed to be normal, install the controller in a suitable position inside the light pole, secure the control box cover with bolts, and ensure the control box is properly sealed to prevent dust or rain from entering and affecting equipment operation.
Common Fault Handling in Solar Street Light Installation
The Street Light is Inoperative
Controller failure: Water ingress and short circuits in the controller are common causes of street lights not working. Check the controller terminals for water stains or signs of rust, and use a multimeter to measure the resistance between the two ends of the circuit. If the resistance is too low, it indicates a short circuit, and the controller must be replaced immediately.
Battery or solar panel issues: If the controller is functioning normally, measure the battery voltage to determine if the battery can charge properly. If the battery cannot store electricity, it needs to be replaced. Check the voltage and current output of the solar panel under normal lighting conditions. If the output is abnormal, the damaged solar panel needs to be replaced.
Light source failure: Supply power to the LED light source separately and test if it can light up normally. If it does not light up, the light source needs to be replaced.
Solar Street Lights shorten Lighting Time
After using them for a while, even if there's plenty of sunlight during the day, the street lamp lighting time still shortens, and they can't be used normally on cloudy or rainy days. This is likely because the battery performance has dropped, and the storage capacity has decreased. At this point, you need to replace the battery with a new one that has the same specs as the original battery.
After Installation, The Light Stays on
Check if the positive and negative terminals of the solar panel are connected correctly. If they're reversed, you need to fix it right away. Use a multimeter to measure the voltage of the solar panel. If the voltage is too low, it may be due to a quality issue with the solar panel, and you should contact the supplier for a replacement.
Only Certain Street Light Beads Operate
Loose soldering of the light beads or damage to the light source itself is the main cause of some light beads not illuminating. If it is loose soldering, the light beads need to be replaced and securely re-soldered; if all the light beads are properly soldered but some emit dim light, the entire street light head needs to be replaced.
Flickering Light
First, try replacing the light bulb. If the issue persists, check if the cable connections are secure. If the wiring is fine but the light still flickers, it might be due to battery aging or insufficient storage capacity, so the battery should be replaced promptly.

How to Maintain Solar Street Lights Scientifically and Effectively?
Clean the Solar Panels
The surface of solar panels can accumulate dust, leaves, and other debris, which affects light absorption efficiency. It is recommended to regularly clean the solar panels with a soft cloth and soapy water to keep the surface clean and improve power generation efficiency.
Inspect for Damage
Regularly inspect the street light housing, lamp posts, and other components to check for loose bolts, rust, cracks, or other issues. If any damaged components are found, they should be repaired or replaced promptly to ensure the structural safety and stability of the street light.
Test the Functionality
Regularly test the functionality of the street light's sensors, timers, switches, and other components to ensure they are operating normally. If any malfunctions are detected, promptly repair or replace the faulty components to ensure the street light operates according to the set program.
Replace Old Batteries
The average service life of solar street light batteries is 2–3 years. As batteries age, street light performance gradually declines. To ensure normal operation, regularly inspect battery condition and promptly replace aged batteries to maintain lighting effectiveness.
Through the aforementioned scientific site selection, standardized installation, and meticulous maintenance, solar street lights can fully leverage their advantages of energy efficiency, environmental friendliness, and low maintenance costs. Whether in urban streets, rural roads, or scenic areas, proper site selection and installation lay the foundation for stable operation, while regular maintenance ensures long-term efficient service, continuously contributing to the development of a green and energy-efficient lighting environment.