How to Install Solar Street Lights with Separate Solar Panels
Jun 25, 2025
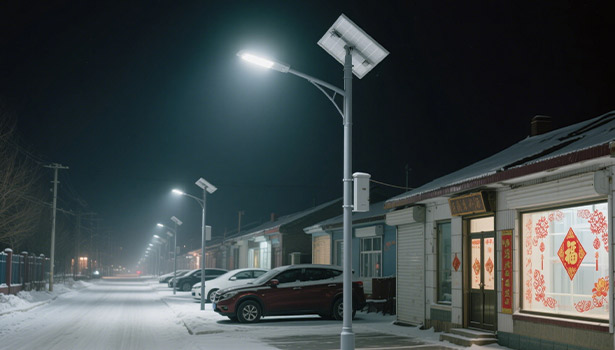
In the face of surging demand for green lighting, split solar street lights break through traditional limitations with their innovative “component separation” design. By installing solar panels independently to maximize sunlight exposure, and arranging batteries and lighting fixtures according to specific needs, these lights achieve a 20%-30% increase in light utilization efficiency. They also demonstrate significant advantages in complex environments, including flexible installation and convenient maintenance, making them an optimal solution for low-carbon outdoor lighting.
Introducing the Split Solar Street Light
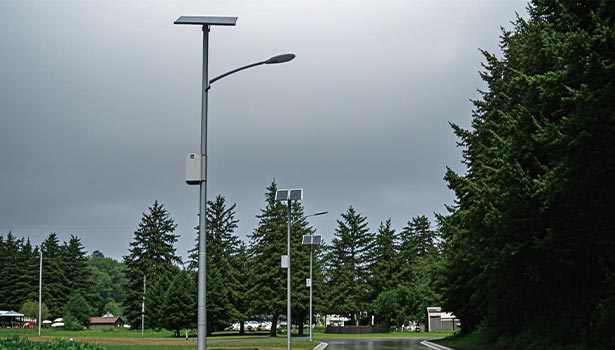
Traditional solar street lights typically integrate solar panels, batteries, and LED lights into a single unit. While this integrated design is compact, it has certain limitations in practical applications. The split solar street light boldly breaks this mold by separating these key components. Solar panels are generally installed at the top of the lamp post or on nearby buildings with good sunlight exposure. This design allows the solar panels to avoid being shaded by the lamp or battery, ensuring optimal sunlight exposure. LED lamps and battery units are installed at appropriate heights and locations based on lighting requirements and environmental characteristics, thereby achieving efficient lighting.
Significant Advantage Comparison
|
Comparison Item |
Traditional All-in-One Solar Street Light |
Split-Type Solar Street Light |
|
Light Utilization Rate |
Integrated design may cause partial shading during certain times, limiting light efficiency |
Independent solar panel installation allows flexible angle adjustment, improving light efficiency by about 20%-30% |
|
Installation Flexibility |
Requires unified installation and more space for placement |
Components are separated, allowing tailored installation to suit complex environments |
|
Performance |
Components can affect each other in extreme conditions like high heat, leading to performance drops |
Battery and solar panel are separate, enabling better heat dissipation and more stable performance |
|
Maintenance Convenience |
Centralized components require full disassembly for repairs, making maintenance more difficult |
Independent parts allow targeted repair or replacement, reducing maintenance time and cost |
Tools Required for Installation
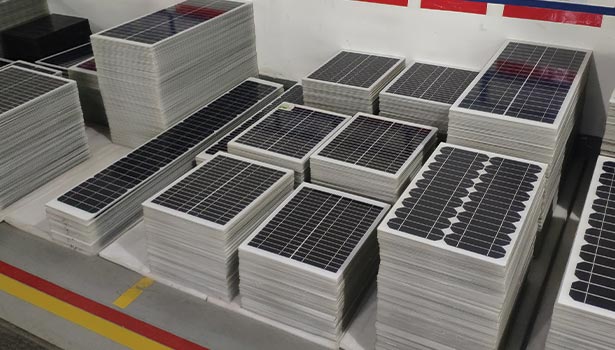
Before installing a split-type solar street light, it is essential to carefully verify that all required components are present. A complete split-type solar street light system primarily includes solar panels, LED lighting fixtures, battery packs, mounting brackets, connection cables, and various installation hardware components. In addition to the components, basic installation tools such as wrenches, screwdrivers, drills, tape measures, gloves, and ladders must be prepared. Additionally, to ensure the safety of construction personnel, safety equipment such as hard hats and safety harnesses must be prepared to prevent accidents during high-altitude work.
Key Considerations Before Installation
Sunlight Exposure
The solar panel is the primary energy source for the entire streetlight system, and its efficiency in capturing sunlight directly impacts the operational duration and stability of the streetlight. Solar panels require at least 6–8 hours of direct sunlight daily to ensure the battery pack has sufficient power reserves. When selecting an installation location, conduct a detailed survey of the surrounding environment to avoid obstructions such as trees or buildings. If the installation location is improper and sunlight is insufficient, it will significantly impact the streetlight’s battery life, potentially causing the streetlight to shut off prematurely at night or fail to start normally.
Mounting Height
The installation height of LED lighting fixtures directly affects lighting performance. To achieve optimal lighting effects, LED fixtures are typically installed at a height of 3–5 meters above ground level. However, this height is not fixed and should be adjusted based on actual conditions. For narrow paths with a relatively small lighting area, the installation height can be appropriately lowered to enhance local lighting intensity; for wider roads, squares, and other areas, the fixture height should be correspondingly increased to ensure sufficient lighting coverage and avoid lighting blind spots. Additionally, the height of pedestrians and vehicles must be considered to prevent fixtures from being too low and causing interference or safety hazards.
Cable Length
Planning the cable length connecting the solar panel, battery, and luminaire is a critical step in the installation process. The cable length must be appropriate—neither too short to connect all components nor too long to cause tangling or excessive tension. Most split-type solar street lights are equipped with cables ranging from 3 to 5 meters in length, which generally meet standard installation requirements. However, in special installation environments, custom cable lengths may be required based on actual distances.
Installation Steps of Split Solar Street Light
Install the Solar Panel
As the energy core of the system, the installation of solar panels directly affects the power generation efficiency and lifespan. First, use the supporting bracket to fix the solar panel to a stable position, such as a metal light pole, wall or roof. During installation, please use a level to ensure that the bracket is level, with the northern hemisphere facing south and the southern hemisphere facing north to maximize the absorption of sunlight.
After securing the bracket, tighten the solar panel using nuts and bolts according to the diagonal tightening principle to ensure even force distribution and prevent panel deformation. In coastal or windy areas, additional securing devices such as wind clamps can be added. If the panel is adjustable, leave space for angle adjustment, reducing the angle in summer and increasing it in winter to adapt to changes in the sun's altitude angle. Finally, route the cables through protective conduit to the battery. Avoid excessive bending during cable routing, leave sufficient length for adjustments, and maintain neat cable management.
Set Up the Battery Pack
The battery pack is the key to energy storage, and its installation environment and quality directly impact its lifespan. Select a cool, dry location protected from direct sunlight, such as inside a light pole, a small building, or a waterproof enclosure. Ensure proper airflow through ventilation fans or vents to prevent high temperatures and humidity from affecting battery performance.
Secure the battery box with screws or straps to ensure waterproofing and ease of maintenance. Inspect the sealant strips during installation. When connecting the battery to the solar panel cables, follow the manufacturer's instructions based on the battery type (lead-acid, lithium-ion, etc.). After installation, use a multi meter to measure the voltage; 12–18 volts is normal. You can also observe the charging indicator light for assistance in judgment. If abnormalities occur, inspect the wiring.
Install the Light Fixture
Mount the LED fixture to the pole using the matching bracket and use a level to ensure it is level. Adjust the direction of illumination as needed; road lighting should be perpendicular to the road, and square lighting should be adjusted as required. When connecting the fixture to the battery cable, strictly follow the red positive and black negative wiring, secure with wire caps or clamps to ensure a firm connection and prevent loosening. Many streetlights have dimming, motion sensing, and light control functions. After installation, configure these functions as needed. The dimming function can adjust brightness by time segment based on foot traffic, the motion sensing function adjusts sensitivity and range for energy savings, and the light control function sets on/off times based on local sunrise and sunset times.
Installation of the Pole
The light pole supports the entire system, and its installation affects stability and safety. Use a crane to erect the light pole, ensuring that the hook is positioned correctly during lifting. When placing it on the concrete foundation, align the bottom four bolts with the holes in the foundation plate. Use a spirit level to check the verticality; if it is not vertical, it will cause uneven stress on the components and increase the risk of tipping.
Fine-tune the pole to align the light arm vertically with the road using a theodolite for precise measurement. Secure the pole with bolts and nuts, applying the specified torque. For large poles, perform secondary concrete pouring to enhance stability. Proceed with subsequent work only after the concrete has cured to the required standard.
Finalize and Test
After installation, perform functional testing first. Cover the solar panels with cloth to simulate nighttime conditions and check the streetlight's light control functionality, observing the startup and shutdown times. Test the dimming functionality at different brightness levels and the response of the human presence detection functionality. Additionally, simulate adverse weather conditions such as rain and wind to assess the streetlight's operational stability.
Next, perform a line inspection, thoroughly inspecting cable laying to check for issues such as damaged outer casings or loose connections. Minor damage can be repaired with insulating tape, while severe damage requires cable replacement. Organize and secure cables to ensure compliance with minimum bending radius requirements. For buried cables, pay attention to burial depth and protective covers. Inspect connection points, tighten loose areas, and address oxidation points.
Finally, components are reinforced by retightening screws and brackets, with special emphasis on reinforcement in areas with strong winds. Anti-loosening washers and thread locking agents are used to enhance connection reliability. The verticality of the lamp posts is checked and corrected to ensure the long-term stable operation of the streetlights.
Maintenance of Split Solar Street Lights
Keep Solar Panel Clean
Regularly cleaning the solar panel is an important measure to ensure its power generation efficiency. Dust and dirt on the surface of the solar panel can block sunlight and reduce power generation efficiency. When cleaning, rinse the solar panel with clean water, then use a clean cloth to wipe away dust and dirt. Avoid using hard objects or corrosive cleaners to prevent damage to the coating on the surface of the solar panel. Cleaning should be done in the early morning or evening to prevent high temperatures from damaging the panel surface.
Battery Maintenance
Strictly following the battery usage and maintenance instructions is key to extending the battery's lifespan. If the battery is undercharged or the streetlight malfunctions, it may be due to battery corrosion. Carefully remove the battery and inspect the connection points and metal components for dust or corrosion. For minor corrosion, use a soft-bristle brush to clean; for severe corrosion, use fine sandpaper to grind. If corrosion cannot be repaired, replace the battery promptly.
During regular use, regularly check the battery's voltage, electrolyte specific gravity, and other parameters to promptly identify potential issues. For lead-acid batteries, regularly top up with distilled water to maintain the electrolyte's normal level. For lithium batteries, avoid overcharging or over-discharging, and follow the manufacturer's recommendations for charging and discharging. Additionally, pay attention to the battery's storage environment and avoid storing it in high-temperature or humid conditions.
Check Wiring
Inspect the wiring every 3–6 months to check for issues such as damaged wires or loose connections, and promptly replace any faulty wires to prevent minor issues from causing system failures and extend the lifespan of the streetlights. When inspecting the wiring, use professional testing tools such as multi meters and insulation resistance testers to measure parameters such as resistance and insulation performance.
The key to the installation and maintenance of split-type solar streetlights lies in “precise installation” and “scientific maintenance”: from adjusting the angle of the solar panels to calibrating the verticality of the lamp posts, from creating a constant-temperature environment for the batteries to preventing loose wiring, every detail is aimed at efficiency and stability. The maintenance system, which includes regular cleaning, battery monitoring, and wiring inspections, ensures the long-term operation of the equipment. As a fusion of clean energy and smart lighting, it is not only a practical technology for cost reduction and efficiency improvement but also provides a sustainable lighting solution for green infrastructure in urban and rural areas.