7 Misunderstandings in the Installation of Solar Street Lights
Sep 25, 2025
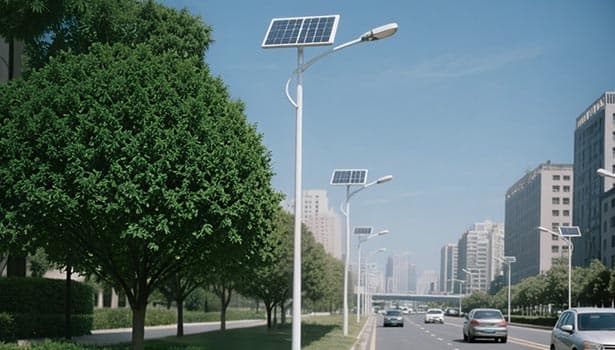
Today, solar street lights have gained widespread adoption in urban and rural roads, residential complexes, scenic trails, and country roads due to their advantages of “zero electricity costs, easy maintenance, and zero pollution.” Many users assume that “installing solar street lights is simple—just find a spot to mount them,” overlooking how installation details impact equipment lifespan and performance.
A residential complex installed solar panels in a shaded area to cut costs, resulting in lights operating only 3 hours daily. In a rural area, batteries placed in damp underground pits caused all 10 sets to swell and fail within six months... These issues stem from common installation pitfalls. This article dissects seven core misconceptions in solar outdoor street light installation, offering solutions and practical advice to help you avoid “breakdowns after installation” and “insufficient illumination.”
Misunderstanding 1: “Install Solar Panels Anywhere Available”
Common Misunderstanding
Many users believe “solar panels just need sunlight exposure,” installing them under trees, on building sides, or beneath billboards for aesthetics or convenience.
Actual Harm: Power Generation Halved
Solar panel efficiency relies on unobstructed direct sunlight. Even minor branch shadows cause localized “hot spot effects”—shaded areas fail to generate power while draining energy from other sections, eventually burning out the panel.
One scenic area installed solar led street lights under cherry blossom trees. During spring's dense foliage, daily effective sunlight hours for the panels plummeted from 6 to just 2 hours. Nighttime illumination lasted only 1.5 hours, completely failing to meet lighting needs.
Correct Solution
- Pre-install sunlight surveys: Use a “sunlight tracking app” on your phone to record sunlight at the installation site for 3 consecutive days, ensuring no obstructions between 9:00 AM and 3:00 PM daily.
- Avoid fixed obstructions: Position solar street lights at least 5 meters away from trees, buildings, utility poles, etc., to prevent seasonal leaf fall or snow accumulation on the panels.
- Prioritize south-facing orientation: In the Northern Hemisphere, solar panels should be installed facing south (with no deviation exceeding 15°) to maximize midday sunlight absorption.
Misunderstanding 2: Solar Panel Angle Can Be “Adjusted Arbitrarily”
Common Misunderstanding
“A slight angle difference doesn't matter since the sun hits it daily”—this is a common misconception among non-professional solar street light installers, who sometimes mount panels horizontally or vertically.
Angle Determines “Direct Sunlight Efficiency”
Solar panel power generation correlates directly with the “angle of sunlight incidence” — peak efficiency occurs when sunlight strikes the panel perpendicularly. Greater angle deviation reduces efficiency. For example, in a 30°N latitude region, reducing the panel angle from 40° to 20° decreases winter power generation by 40%.
Recommended Angles by Latitude
|
Latitude Range |
Recommended Installation Angle |
Notes (Seasonal Adjustments) |
|
20°–30° N |
30°–35° |
Reduce by 5° in summer, increase by 5° in winter |
|
30°–40° N |
35°–45° |
Northern winters are cold; angles should be larger rather than smaller |
|
40°–50° N |
45°–55° |
Avoid winter snow accumulation on panels |
|
South Latitude 20°–40° |
30°–45° |
Adjust south-facing panels to north-facing orientation |
Practical Tips
Use a protractor and spirit level for adjustments. When mounting panels, reserve adjustment holes at the bracket base for fine-tuning angles during seasonal changes.
Misunderstanding 3: “Good Enough” Approach to Solar Street Light Wiring
Common Mistakes
- Using random extension wires, e.g., connecting a 30W solar powered street light with 0.75mm² cable;
- Exposing joints with only tape wrapping, no waterproofing;
- Reversing polarity without labeling, making troubleshooting impossible later.
Serious Consequences
- Insufficient wire gauge: Excessive current causes wire overheating, reducing charging efficiency at best and causing circuit fires at worst;
- Waterproofing failure: Rainwater infiltrates joints, leading to short circuits, battery swelling, and controller damage;
- Incorrect polarity connection: Directly burns out solar panels or batteries, causing irreversible damage.
Solar Street Light Wiring Standards
|
Solar Street Light Power |
Recommended Wire Gauge |
Connection Requirements |
Maximum Wiring Distance |
|
10W–20W |
1.5mm² copper core wire |
Use IP67 waterproof connectors with waterproof tape wrapping |
≤20 meters |
|
20W–40W |
2.5mm² copper core wire |
Soldered connections with heat shrink tubing, plus waterproof box |
≤30 meters |
|
40W–60W |
4mm² copper core wire |
Use waterproof junction box, fill with sealant |
≤50 meters |
Testing Procedure
After wiring completion, use a multimeter to test:
Measure open-circuit voltage: Solar panel should display 18V-24V under sunlight (varies by specification);
Measure short-circuit current: Ensure stable current without fluctuations;
Verify polarity: Use a polarity tester to confirm correct wiring, label both ends with “POSITIVE / NEGATIVE” markings.
Misunderstanding 4: Installing Other Light Sources Near Solar Panels
Common Error Scenarios
- Residential areas installing wall lights or landscape lights beside solar outdoor street lights;
- Rural roads installing solar led street lights alongside grid-connected lights within 3 meters;
- Scenic areas installing floodlights beneath solar panels to illuminate pathways at night.
Core Issue: Light Control System “Misjudging Day/Night”
Solar street lights' “light control switches” determine illumination based on ambient light intensity (typically activating below 50 lux). If other light sources exist nearby—even a 10W wall lamp—the system may mistakenly assume “daylight persists,” causing solar LED street lights to remain off at night or shorten illumination duration.
Solutions
- Distance isolation: Maintain at least 5 meters between other light sources and solar panels to prevent direct light exposure;
- Opt for dual control: Switch to solar street lights with “light sensor + timer” dual-mode operation. Even if the light sensor malfunctions, the timer ensures illumination at preset times.
- Adjust panel angle: If light sources cannot be avoided, slightly tilt the solar panel away from the light source.
Misunderstanding 5: Solar Street Light Batteries Can Be “Placed Anywhere”
Common Misunderstandings
- Burying batteries in underground pits without waterproofing, leading to waterlogging after rainfall;
- Storing batteries in sealed boxes at the base of lamp posts without ventilation holes, causing overheating during summer heat;
- Using ordinary plastic containers for batteries, which deform under prolonged sun exposure, resulting in poor battery contact.
2 Primary Causes of Battery Damage
- Moisture Corrosion: Lead-acid batteries oxidize electrodes when exposed to water, while lithium batteries develop bulging (reducing lifespan from 3 years to 1 year);
- Extreme heat exposure: Battery charging efficiency drops by 50% when operating temperatures exceed 45°C, and prolonged high temperatures cause electrolyte leakage.
Proper Storage Methods
- Use dedicated battery enclosures: Prioritize ABS material with IP65 or higher waterproof ratings (resistant to heavy rain and dust);
- Ventilation holes: Drill 3-5 ventilation holes (5mm diameter) on the sides or bottom to prevent heat buildup;
- Keep away from heat sources: Avoid installing the box at the top of the pole (exposed to summer sun) or underground (damp conditions). Mount it at a height of 1.5 meters on the solar street light pole.

Misunderstanding 6: Solar Street Light Pole Foundations “Just Need to Stand”
Common Misunderstanding
“The pole isn't tall, so a 30cm foundation depth is sufficient,” especially when installing solar powered street lights on rural roads to save time and costs by simplifying foundation construction.
Safety Hazard: Pole Toppling
Pole foundations must not only support the pole's weight but also withstand external forces like strong winds and heavy rain. In China's southeastern coastal regions, a typhoon caused 10 unreinforced 6-meter poles to topple, with 3 striking roadside vehicles and causing economic damage.
Foundation Construction Specifications (by Pole Height)
|
Pole Height |
Foundation Diameter |
Foundation Depth |
Concrete Strength |
Curing Time |
|
4 m – 5 m |
40 cm |
60 cm |
C20 |
≥5 days |
|
5 m – 7 m |
50 cm |
80 cm |
C25 |
≥7 days |
|
7 m – 10 m |
60 cm |
100 cm |
C30 |
≥10 days |
Construction Key Points
- Lay a 10 cm thick gravel layer at the foundation base to enhance drainage;
- Use a level to calibrate embedded bolts, ensuring the light pole is vertical and free of tilt after installation;
- Cover with geotextile and water-cure after concrete pouring to prevent cracking.
Misunderstanding 7: “Haphazardly Connecting” Solar Street Light Extension Cables
Common Errors
- Using standard wires to extend 50 meters to mount solar panels at height;
- Splicing multiple short wires with 3-4 joints;
- Substituting aluminum-core wires for copper-core wires, thinking “cheap is good enough.”
Key Issue: Excessive Voltage Loss
Longer cables, smaller diameters, and lower conductivity materials cause greater voltage loss. For a 50-meter cable:
- Connecting a 30W solar LED street light with 1.5mm² aluminum wire results in 3V voltage loss, reducing battery charge by 30%;
- Using 2.5mm² copper wire reduces voltage loss to just 0.8V, with minimal impact on charging efficiency.
Cable Extension Solutions
- Prioritize distance reduction: Keep the distance between solar panels, controllers, and batteries under 20 meters whenever possible;
- Choose copper wire: Copper wire has 1.6 times the conductivity of aluminum, resulting in lower losses and greater durability over time;
- Minimize joints: Use single-length cables without joints whenever possible. If splicing is necessary, use waterproof connectors and ensure proper sealing.
Avoiding Solar Street Light Installation Pitfalls
Solar street lights typically have a “golden lifespan” of 8-10 years, but installation errors often cause severe failures within 3-5 years. Before installation, carefully review the product manual (specifications may vary across controller and battery brands). If unfamiliar with technical details, engage a qualified installation team—professional setup can enhance performance by 60% and extend lifespan by over 5 years. Let experts handle specialized tasks to fully leverage solar street lights' energy-saving and durable advantages, ensuring reliable illumination for your roads and campuses.